Introducing HashCSS - Powerful tools for css needs.
Netlify x Hashnode Hackathon Submission


If you are a web developer or simply a software developer whose in need to quickly beautify your project fastly then, congrats you arrived to the right place.
This post is all about - "one place for most useful CSS tools".
HashCSS is a one in all css tools that somehow ,you will need as a frontend developer or maybe any software developer.
The main goal of the project is to provide developers including beginners students a place where you will get the required css tools all in one place, no rubbish anymore.
This project is fully open-sourced and is a submission for the Hashnode + Netlify hackathon Feb 2022.
Get the app here
Github Repo: https://github.com/abhiprojectz/hashcss
Live website: https://hashcss.netlify.app/
Home page: https://hashcss.netlify.app/home.html

Introduction
The app contains useful css tools to customise and get the generated css code easily.
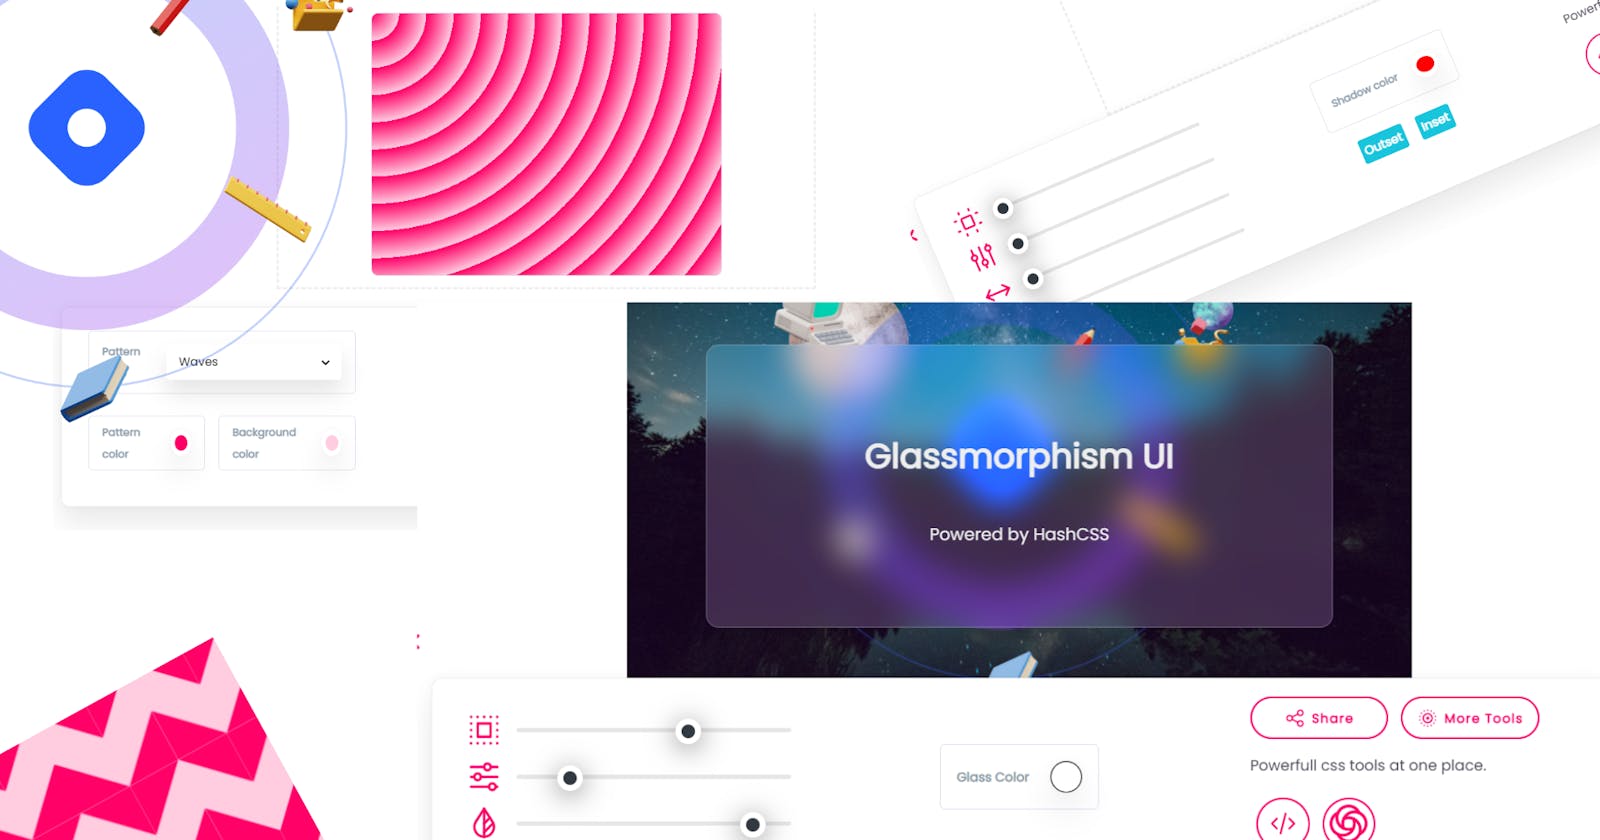
The app contains Glassmorphism UI generator , Css shadow generator , Borders generator , CSS background generator.
You get a web UI app where you can customize various css effects and see the changes real time and ofcourse can grab the generated css codes to use in your next project.
All coded with only 2 aims simplicity and customizability.

What is netlify ?
As the tagline says - "Build the future of the web"
Which describes it all, Netlify unites an entire ecosystem of modern tools and services into a single, simple workflow for building high performance sites and apps.
So, if you wanna deploy your next project then must visit Netlify now!
If you want to read thier documentation then, refer Netlify Docs
Is it customisable ?
Yes , its fully customisable and there are certain settings which you may further configure accordingly.

What's different ?
The UI is kept clean and dry. The customising tools have been there only as required so that even beginner can use in a very hazzle free manner.
"only as required" - means that less tuning tools so less confusion and better productivity.
What actually is glassmorphism ?
Glassmorphism is a term that is used to describe UI design that emphasizes light or dark objects, placed on top of colourfull backgrounds.
A background-blur is placed on the objects which allows the background to shine through basically , giving it the impression of frosted glass.
Just tune some rangebars according to your needs , pick a color and hola copy the generated code.
See, its that simple.
So, what are you waiting for ? Must have a try on the website it hardly takes a minute or less.
How many tools are there ?
There are 4 tools currently and there is also an add on for animations.
Features
Below is a list of all the features that this app contains.
Only useful tools , no rubbish because i value time.
Beginner friendly , easy UI that even beginner's can use, hover on props to know for what's it via tooltips.

Super fast style with ease.
Grab the code with even a lit of customization and copy it.

Highly customisable , free to use & opensourced.
GlassMorphism UI generator to beautify your next project that catches user attention.

- CSS Pattern generator where you may pick a pattern and then customize accordingly , which can be used as a background for any html element.

- Shadow generator that you can use only html parametric element.

- Borders generator , this tool can be used to even create css shapes depends on creativity.


- No experience required, just customize & copy.
Is it mobile friendly ?
Yes, its 100% responsive app. Its UI is mobile friendly , convenient to use for everyone.

Examples :
Below are descriptive examples of the tool usage and outputs.
Glassmorphism UI
To create a stylish glass like Ui just tune and get the output like below:

And grab the generated CSS output:
<style>
.GlassBox {
backdrop-filter: blur(15px) saturate(1.8);
-webkit-backdrop-filter: blur(15px) saturate(1.8);
background-color: rgba(255, 255, 255,  0.16);            border-radius: 12px;
border: 1px solid rgba(209, 213, 219, 0.3);
 }
</style>

<div class="GlassBox"></div>
Background Pattern example:
Go ahead to below link to use the background pattern generator:
Pattern : hashcss/pattern
Here's how the cubesi pattern looks like:

Pick a pattern and grab the generated code:
background-image:  repeating-radial-gradient(circle at 0 0, transparent 0, #ffcce0 44px), repeating-linear-gradient(#FF0066, #e22251);
background-color: #ffcce0;
There are many more patterns , go have a look at them.
Borders generator
Borders shape a lot in the interface of any web app , have the right borders leaves a massive impact on your users.

So, use this tool wisely.
Below is the generated code in this case:
<style>
.box {
width: 100px;
height: 100px;
background-color: #651FFF;
border: 5px solid rgb(0, 255, 255);
border-radius: 35px 38px 7px 12px;
}
</style>

<div class="box"></div>
In short , you may basically use the below snippet to style the element.
border: 5px solid rgb(0, 255, 255);
border-radius: 35px 38px 7px 12px;
Shadow generator
The last but not lease is the shadow generator tool, i think its name is enough to describe about it.
Tool: Shadow
See above is the shadow effect.

And below is the code that's get generated.
<style>
.box {
width: 100px;
height: 100px;
background-color: #651FFF;
box-shadow: rgb(255, 0, 0) 24px 19px 25px 5px;
 }
</style>

<div class="box"></div>
Simply , you may use the below snippet to add the shadow effect.
box-shadow: rgb(255, 0, 0) 24px 19px 25px 5px;
How you may configure settings?
The app also supports some configuration which, you may simply set using the setting button in the navbar.
BUT, wait how does it saves the settings?
Its quite simple using the browser's localStorage.
The animation setting is saved by creating a #anim id var in the storage.
if (localStorage.getItem("anim") === null) {
        localStorage.setItem(document.querySelector("#anim").id, document.querySelector("#anim").checked);
    }
Similar for the other one.
if (localStorage.getItem("hints") === null) {
        localStorage.setItem(document.querySelector("#hints").id, document.querySelector("#hints").checked);
}
And then using the JSON.parse() method to parse the values as they are stored in json objects.
anim.checked = JSON.parse(localStorage.getItem(anim.id));
I hope , you get to learn something new from this!
Tech Stacks used
Below is the description of the stack being used.
HTML/CSS/JS is the main stack.
Netlify for deployment of the project.
Project showcase platform as hashnode.
Open-sourced on github.
Bonus part
Apart from css tools , there is something even more amazing for you that is customizable built-in animations.

Motionia.js (Motionia is a lightweight simplified on demand animation library!) is a js library which you can use to create beautiful css animations by just one line of code, yes you heard right.
Github Repo : https://github.com/abhiprojectz/motionia
Live website: https://abhiprojectz.github.io/motionia/
This is a project which i created last year , through which you may pick a animation and customize it accordingly through a efficient js api.
Just include the script into the head of your project and animate anything including attributes etc, by just few lines of codes.
For example:
motionia('#el', 'fadeIn', props);

or

<div data-motionia='fadeIn'> hi!, i am a fading in text! :)
 </div>
Or you may use the javascript for some reasons to add the animation dynamically.
 var myAnim = new motionia()
// initialize motionia.js

myAnim.mo({
targets: '#div',
anim: 'rollLeft'
duration: '5s'
})
// targets can be any html parametric element and
// then customize according to your needs!
// using simple JSON like structure.
You may visit the GitHub repo for more information.
Say Goodbye to page long CSS Keyframes.
Wrapping up
The main goal of the project is to motivate new developers to master how things work in real UI that is, what sorts of code effects what in css.
There are many tools available in the web , but this one is created by keeping in mind the simplicity & up to the point concept.
Thanks for conducting this hackathon.
Created for Netlify x hashnode hackathon Feb 2022.
Get the app here
Github Repo: https://github.com/abhiprojectz/hashcss
Live website: https://hashcss.netlify.app/
Home page: https://hashcss.netlify.app/home.html